one branch to rule them all | guided series #3
Last time, we set up versioning and containerization of our app. Now, it's time to implement and configure deployment targets so that we will have both staging and production environments available.
Hey, good to have you here today.
tl;dr: My goal for this short series is very simple: teach you by example. Together, we're going through the full process I follow to solve various problems:
- 🔍 gather and understand requirements
- 🧠 brainstorm solutions
- 🎯 scope
- 👨🏻💻 implement & test (iterate until convergence)
- 🛑 stop (sounds easy? :p)
What are we working on in this series?
Last time, we scoped the problem and selected solutions for every requirement. We've also (finally!) started the implementation. At this point, our application is versioned in two useful ways:
- git tags
- Docker image tags
Sounds interesting, but you haven't read it yet? No worries, here it is:
If all you need is code, you can check out the checkpoint from the previous post here.
Today, we're going to focus on the deployment targets. We'll cover the following topics:
- .env vs. YAML file formats
- Google Cloud Platform's Cloud Run 101
- wrapping the deployment using a shell script
- how to use all of this in practice with git
. ├── 👨🏻💻 Implement & test │ │ │ └── Step 2: configure deployment targets │ │ │ ├── File format │ ├── Configure gcloud CLI │ ├── Deploy to Cloud Run │ ├── Wrap deployment with bash │ └── How to use this in practice with git │ └── 🛑 Stop?
👨🏻💻 Implement & test
Since the first step of the implementation is already done, we can start with the second one.
Step 2: configure deployment targets
This step is the final chapter of the versioned app deployment story (not an epilogue, though), in which I will show you how to use simple .env files to configure staging and production environments separately.
File format
I'm fully aware that there are many different formats and standards that can be used to manage configuration of the applications and deployments.

Source: xkcd.com
For this tutorial, I hesitated slightly between .env and YAML.
.env is extremely simple. It contains the information in the following format:
# .env

ENVIRONMENT=production
PORT=12345
DOCKER_IMAGE=toolongautomated/tutorial-1:1.0.0
As you can see, it just stores shell variables, one in every row. It doesn't have any sections, nested structure, none.
YAML can do what .env does + much, much more. We will briefly mention basic structure, but if you'd like to read about all that is available, go and dive into raw specification of this language.
The above .env example would look very similar when written in the YAML format:
# config.yaml

environment: production
port: 12345
docker_image: toolongautomated/tutorial-1:1.0.0
What is nice about it is that it can add structure by e.g. nesting levels:
# config.yaml

environment: production
port: 12345

docker:
  image: toolongautomated/tutorial-1
  tag: 1.0.0
This is definitely easier to read. Not only that, though. Such structure allows for separation between various applications configured via single env-specific file:
# config.yaml

app1:
  environment: production
  port: 12345
  docker:
    image: toolongautomated/tutorial-1
    tag: 1.0.0

app2:
  environment: production
  port: 3333
  docker:
    image: toolongautomated/tutorial-2
    tag: 0.4.0
Basic .env file wouldn't allow to do that without using e.g. long prefixes:
# .env
...
APP2_DOCKER_TAG=0.4.0
...
Don't get me wrong, it's still completely fine, but some may find it harder to grasp in the first look. Let's look at the YAML example converted to .env:
# .env

# APP1
APP1_ENVIRONMENT=production
APP1_PORT=12345
APP1_DOCKER_IMAGE=toolongautomated/tutorial-1
APP1_DOCKER_TAG=1.0.0

# APP2
APP2_ENVIRONMENT=production
APP2_PORT=3333
APP2_DOCKER_IMAGE=toolongautomated/tutorial-2
APP2_DOCKER_TAG=0.4.0
It's not that bad!

You know what, for our mini-project, let's proceed with .env.
Moreover, this tutorial is not about complex logic, but rather about general patterns that I consider good practices. Using YAML would complicate our flow a bit as it'd require installing additional dependency (yq) to parse YAML from CLI and learning its syntax first. I don't want us to focus on that here, so nope. However, in the project you're building, I totally recommend doing it with YAML. It won't be hard to switch from what you'll see below from .env to YAML 🙌🏼
Okay buddy, where do I put these .env files?
app/
docs/
deploy/
├── environments/
│   ├── staging/
│   │   └── .env 👈🏼 here
│   └── production/
│       └── .env 👈🏼 and here
.gitignore
LICENSE
README.md
requirements-test.txt
requirements.txt
If you need more environments than staging and production, simply create a dedicated subdirectory in the deploy/environments directory.
Now, we know where to put the files, but what to put inside them and HOW TO USE THEM TO DEPLOY? Glad you asked.

Here is a summary what we've got so far:
- ✅ application container tagged with a version and pushed to Docker Hub registry
- ✅ env-specific configuration files
- ❌ deployment platform
- ❌ deployment commands/scripts
Next, let's start with the deployment platform. I think that giving you a chance to play with something real (cloud) instead of a local playground (your machine) will be invaluable. I've analyzed free tier rules of the Google Cloud Platform and realized that Cloud Run will be a perfect choice to play with multi-environment deployment tutorial. It is because for our short experiments, it'll be free to use1.
If you'd like this tutorial to be a true hands-on experience, I highly encourage you to set up a GCP project and play with it in the rest of this tutorial. I've prepared a short video on how to create a new project if this is your first time doing it:
If you prefer to read, here's the official docs for you: link.
Okay, so Cloud Run it is. What is Cloud Run?
Let's you run app in containers – that's exactly what we need! Let me show you how to deploy our Flask server as a Cloud Run service.
Configure gcloud CLI
We're programmers, so we're not using any UI to configure stuff, are we? 🥲
Google provides a dedicated CLI tool to manipulate GCP infrastructure from a local machine. It's called gcloud and here are the instructions on how to install it.
Once installed, you need to authorize gcloud:
gcloud auth login
gcloud auth application-default login
Then, we need to set the GCP project that all gcloud commands will run against:
gcloud config set project [YOUR PROJECT ID]
Finally, the quota project needs to also be set to this project ID:
gcloud auth application-default set-quota-project [YOUR PROJECT ID]

With gcloud set, we're good to deploy.
Deploy to Cloud Run
Deploying a Docker image to Cloud Run is extremely simple:
gcloud run deploy tla-tutorial-1-staging \
  --image docker.io/toolongautomated/tutorial-1:1.0.0 \
  --port 80 \
  --region us-central1 \
  --allow-unauthenticated
Here is a full documentation of this command: link.
- tla-tutorial-1-staging is the name of the service that will be deployed
- image is the Docker image that will be deployed. Cloud Run supports GCP's Artifact Registry and Docker Hub out of the box.
- port is the port number in the container to which the requests will be forwarded
- region is the GCP region in which the service will be running
- allow-unauthenticated flag is used with public APIs and websites so that everyone on the Internet can access the service


It is possible to get the public URL for the service you've just deployed:
gcloud run services list

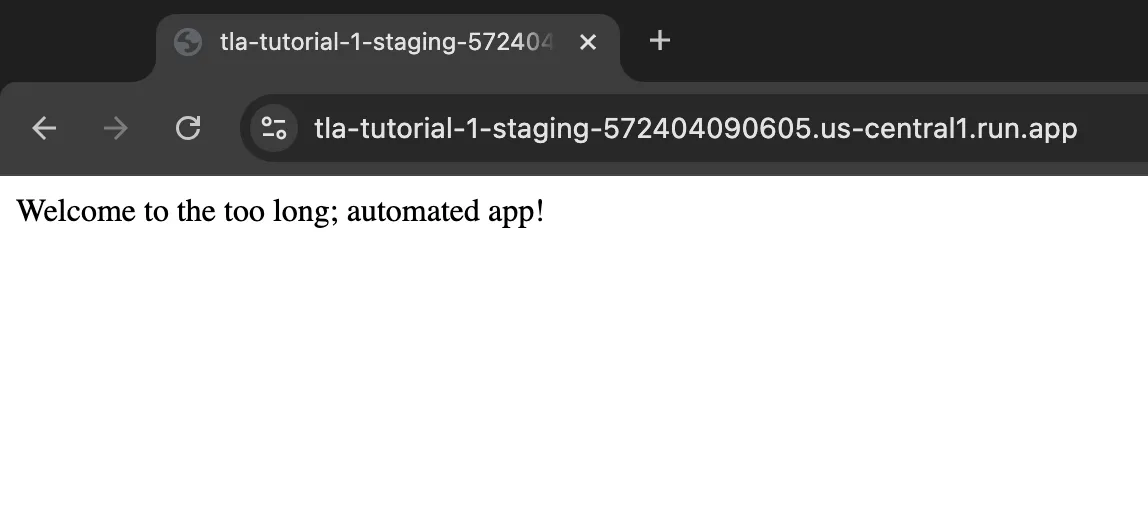
Visit this URL and check whether you see the following screen:

Once you're satisfied with your deployment, let's delete it:
gcloud run services delete tla-tutorial-1-staging \
    --region us-central1
That's basically it – we deployed a containerized application to Cloud Run 🚀
Wrap deployment with bash
gcloud commands above are rather straightforward, I know. They may even be straightforward enough to not do anything more with them. But I'd like to show you a flow leveraging bash scripting that will let you run your app in an arbitrary deployment environment effortlessly. However, to delete a service, we'll still use gcloud command instead of the bash wrapper. My take on deletion is that it often needs to be done carefully, and hence I'm very reluctant to automate such actions.
There are several parameters we need to provide to Cloud Run so that it can create a working service from our Docker image. Let's put these to our .env files:
# deploy/environments/staging/.env

ENVIRONMENT=staging
SERVICE_NAME=tla-tutorial-1
DOCKER_IMAGE=toolongautomated/tutorial-1:1.0.0
REGION=us-central1
PORT=80
# deploy/environments/production/.env

ENVIRONMENT=production
SERVICE_NAME=tla-tutorial-1
DOCKER_IMAGE=toolongautomated/tutorial-1:1.0.0
REGION=us-central1
PORT=80
Both staging and production will be running the same version of the application, with the same configuration. The only difference will be env. As Cloud Run doesn't natively support environments or namespaces, I'm going to simulate this behavior by adding a suffix to the service name that will indicate in which "environment" the service is running.
We need a way to parameterize gcloud deployment command so that the values from a user-selected .env file will be used. For this, I've created the following bash script:
#!/bin/bash

function help() {
    echo "Usage:"
    echo "  deploy: ./manage.bash deploy [ENVIRONMENT]"
    echo ""
    echo "Example usage:"
    echo "  Deploy a service: ./manage.bash deploy staging"
}

function load_env() {
    local env_file="deploy/environments/$1/.env"
    if [ ! -f "$env_file" ]; then
        echo "Error: Environment file not found: $env_file"
        exit 1
    fi

    # Export variables from the .env file into the current shell
    set -a
    source "$env_file"
    set +a
}

# Main script execution starts here
case "$1" in
"deploy")
    # Check if environment parameter is provided
    if [ -z "$2" ]; then
        echo "Error: Environment not specified"
        help_deploy
        exit 1
    fi

    environment="$2"

    # Load environment-specific variables
    load_env "$environment"

    # Deploy to Cloud Run using loaded variables
    echo "Deploying service $SERVICE_NAME-$ENVIRONMENT to region $REGION..."
    gcloud run deploy $SERVICE_NAME-$ENVIRONMENT \
        --image $DOCKER_IMAGE \
        --port $PORT \
        --region $REGION \
        --allow-unauthenticated

    ;;
"help")
    # Display general help message
    help
    exit 0
    ;;
*)
    # Display help for unknown commands
    echo "Error: Unknown command $1"
    help
    exit 1
    ;;
esac
You can use this script as follows:
./manage deploy [ENVIRONMENT]
For instance:
./manage deploy staging
Note that [ENVIRONMENT] needs to strictly match the name of the env-specific subdirectory in the deploy/environments path.
In case of passing staging as the environment value, all the values from the deploy/environments/staging/.env are used to populate the values in the templated gcloud command:
gcloud run deploy $SERVICE_NAME-$ENVIRONMENT \
    --image $DOCKER_IMAGE \
    --port $PORT \
    --region $REGION \
    --allow-unauthenticated
Note that resulting service name will be formed by concatenating $SERVICE_NAME and $ENVIRONMENT, yielding names like tla-tutorial-1-staging or tla-tutorial-1-production.
If you were ever to remove/add new environment, you can just remove/add new subdirectory and .env file in the deploy/environments directory.

Yeah, that's it. Nobody said it's gonna be hard!
Whenever your apps require additional options for deployment, you can simply modify the bash script (called manage in this tutorial) and adjust it to your needs – it's flexible enough to handle many, many use cases.
How to use this in practice with git
We got the configuration files in place, and a script that is used to deploy the apps to the platform of choice (Cloud Run in this tutorial). The final question to be answered is the following:
Whenever you introduce changes to the configuration file.
Remember, we only have the main branch that lives forever. Then, there are short-lived feature branches. No develop branches, no release branches. Basically, nothing that would indicate that whenever we merge code to somewhere, the deployments should be updated.
To update the deployment (or make a new one):
- Open a feature branch from main.
- Make changes to selected .env files or create a new one.
- Merge the changes to main.
- Checkout to main locally, pull latest changes, and run the deployment command for all the environments whose configuration files were updated/created.
- If the environment should no longer exist, remove it manually after the merge.
That's how you do it 🙌🏼
🛑 Stop?
Did you really think we're going to stop here, buddy? I hope not!
In next part of the One branch to rule them all series, we will AUTOMATE 🤟🏼 After all, who likes to manually:
- tag your repository
- build Docker images
- run unit and integration tests
- deploy the application
Stay tuned and see you in the next one!
Footnotes
- ↪ 1 True as of January 13th 2025


